
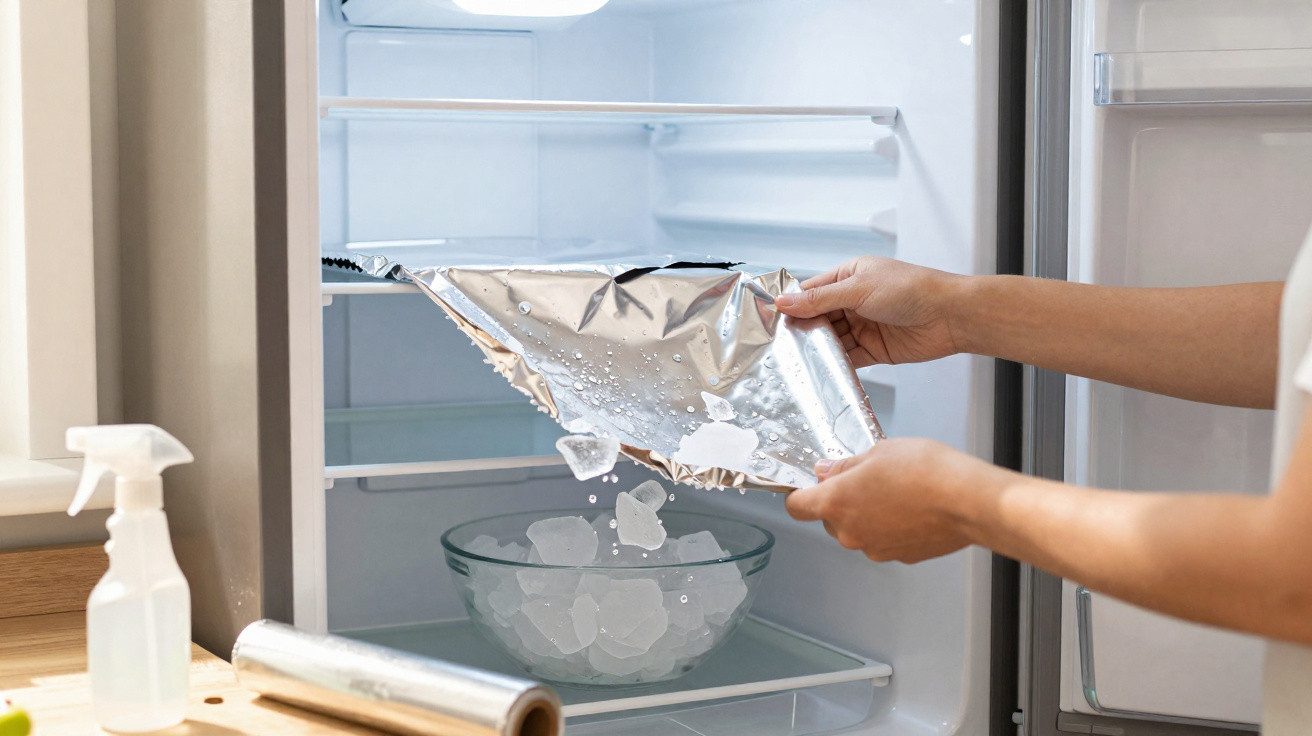
Anyone who has stood, irritated, in front of the freezer with a spoon, spatula or knife knows how draining a heavily iced-up chest freezer can be. Ice blocks compartments, steals space and quietly pushes up your electricity bill. A simple aluminium foil trick can make the ice layer far easier to remove – and routine care of the appliance much less of a chore.
Why ice in the freezer compartment is more than a cosmetic issue
Frost forms in the freezer every time you open the door. Warm, moist air rushes in, hits the freezing-cold surfaces and solidifies there, layer by layer. At first you barely notice it; after a few weeks, thick sheets can be stuck to the inner walls.
It isn’t just unsightly – it has real consequences:
- Ice acts like insulation and slows the transfer of cold.
- The compressor runs for longer to maintain the target temperature.
- Electricity use increases, often noticeably over the course of a year.
- The door seals less well, letting in even more warm air.
- Packaging tears more easily when it freezes onto the ice and gets pulled off.
Plenty of people put defrosting off for months, because the classic routine is: empty everything out, switch the unit off, lay down towels and then wait for hours until the ice finally melts. If you then “help” with a knife or screwdriver, you risk damaging the inner lining or coolant pipes – an expensive mistake if the freezer ends up leaking.
"The real issue isn’t the ice itself, but how firmly it bonds to the inner surface."
How aluminium foil helps against stubborn frost
This is where aluminium foil comes in. The principle is surprisingly straightforward: ice clings especially well to slightly rough, mildly porous surfaces. Many freezer interiors are exactly like that – even if they look smooth, they have tiny imperfections where ice crystals can latch on.
Aluminium foil creates a smooth, non-porous layer in between. That changes how the ice attaches to the surface:
- The ice sticks mainly to the foil rather than directly to the plastic.
- The bond is weaker, so the ice doesn’t “interlock” as much.
- When cleaning, you can peel away the foil along with the ice layer.
"The foil works like a peel-off protective skin: the ice stays on it, not on the appliance."
How to apply aluminium foil correctly in the freezer
For the trick to work properly, the prep matters. Foil that’s slapped on carelessly tends to come loose or won’t hold the ice effectively.
Step-by-step instructions
- Empty the freezer completely
Store sensitive foods briefly in a cool bag or, if temperatures allow, outside. - Remove all existing ice
Switch the appliance off, unplug it and wait until most of the ice has melted. Carefully loosen larger chunks using a plastic spatula. - Dry the interior thoroughly
Wipe every surface with an absorbent cloth until there is no visible moisture. Any dampness left behind can stop the foil from sitting properly. - Cut the foil to size
Cut strips to cover the back wall, the upper section and areas that ice up most. Several smaller pieces are better than one large sheet that constantly creases. - Press the foil on smoothly
The matt side can face inwards or outwards; what matters is that each strip sits as crease-free as possible. Smooth out air bubbles with your hand or a soft cloth. - Secure the edges
Fold the edges neatly around corners. If needed, you can use a narrow strip of tape on dry plastic surfaces – but never tape over vents or sensors.
If you take care at this stage, you’ll notice a clear difference the next time you do a “mini defrost”. Many users report that, instead of a major battle with ice, they only need to peel off and replace a few foil strips every couple of months.
Where aluminium foil makes the biggest difference inside the freezer
Not every part ices up at the same rate. If you’re short on foil, it pays to be targeted.
| Area in the freezer | Typical problem | Using the foil |
|---|---|---|
| Back wall | thick ice layer, reduced space | large sheets, pressed on smooth, especially worthwhile |
| Upper interior area | an “ice roof” over frozen goods | stick one or two longer strips across |
| Corners and edges | small ice webs, hard to reach | small pieces that are easy to swap out |
| Near ventilation slots | rapid icing due to cold air circulation | fit with a gap and keep openings clear |
Over time, you’ll learn which spots your own freezer is particularly awkward about. Those are exactly the areas where the foil barrier pays off most.
How often should you replace the foil in the freezer?
This method won’t turn an older freezer compartment into a “maintenance-free” appliance. But it can cut the work down dramatically. In practice, a cycle of every few months has proven sensible.
At the latest, replacement is a good idea when:
- the foil has torn,
- thick, uneven ice plates have formed,
- the surfaces no longer feel smooth.
"Better to replace a strip once too often than spend hours scraping later."
If you keep a roll of aluminium foil near the freezer, swapping it out often becomes something you do “in passing” – for example when you’re already sorting through your stored food.
Protection against scratches and costly damage
There’s another benefit many people only realise when it’s too late: any hard object used inside the freezer can leave marks. Metal spoons, knives or makeshift ice scrapers can quickly create micro-scratches in the plastic lining. Next time, ice can grip even more strongly in those areas.
Here, aluminium foil acts as a buffer:
- the underlying surface is protected from tools,
- minor knocks from packaging or boxes land on the foil,
- the interior lining stays intact for longer and looks better.
Anyone who has dealt with a punctured evaporator coil or a leaking inner wall knows that a few pence’ worth of foil is insignificant compared with a repair – or a new appliance.
What your habits have to do with ice build-up
Aluminium foil in the freezer is only one part of the picture. Everyday routines also affect how quickly frost forms. Several key factors are fully within your control:
- Open the door less often: “Just having a quick look” lets warm air in every time.
- Group items together: collect several small packs in a box – it reduces air exchange.
- Freeze only well-wrapped food: open containers add moisture to the interior.
- Don’t freeze hot dishes: let them cool fully in the fridge first.
Small habit changes like these noticeably boost the benefit of the foil. The less often (and the less long) the door is open, the fewer chances ice has to build up.
Risks, limits and sensible add-ons
Despite the upsides, the trick does have boundaries. A few points are worth bearing in mind before you reach for the roll:
- In appliances with No Frost technology, don’t place foil over vents or sensors.
- Loose, flapping strips can obstruct fans – so always fit it neatly.
- Aluminium foil must not touch electrical components.
If you’re unsure, check the appliance manual: it often highlights sensitive areas that need to remain unobstructed. Smooth sections of the interior lining can generally be covered without concern.
It’s also practical to combine “foil duty” with a quick stock check: throw out expired or forgotten items, rewrap opened packs properly, and add fresh date labels. That way, an annoying task becomes a manageable routine.
The end result is a freezer compartment that ices up less, is much easier to clean, and helps keep energy use under control – all with something most people already have in the kitchen: a simple roll of aluminium foil.




Comments
No comments yet. Be the first to comment!
Leave a Comment