
Many people clean the oven and its glass door but overlook the encrusted racks – even though this is exactly where grease, soot and stubborn baked-on residue collect.
Anyone who has tried scrubbing burnt-on oven racks in the sink will know the frustration: water everywhere, only half the job done, and no sense of satisfaction. A straightforward but little-known household trick moves the cleaning job into the bath, turning an irritating chore into a manageable routine.
Why burnt-on oven racks are so stubborn
Oven racks are often neglected during kitchen cleaning. Baking trays go into the dishwasher, the glass door gets a quick wipe, while the racks are simply put back into the oven as they are. Every roast, pizza or overflowing oven dish adds fresh layers of grease and protein to the metal.
The difficulty is that the bars have countless edges, corners and gaps. They usually fit into the sink only at an angle, meaning that just part of the rack can be soaked while the rest remains out of the water. An even clean is therefore impossible.
On top of that, people who become frustrated and reach for highly aggressive products risk damaging the material or irritating their skin and airways. Strong-smelling sprays, gloves and masks can make the task even less appealing. It is hardly surprising that many people leave the racks alone until they are already pitch black.
The surprising solution: put oven racks in the bath
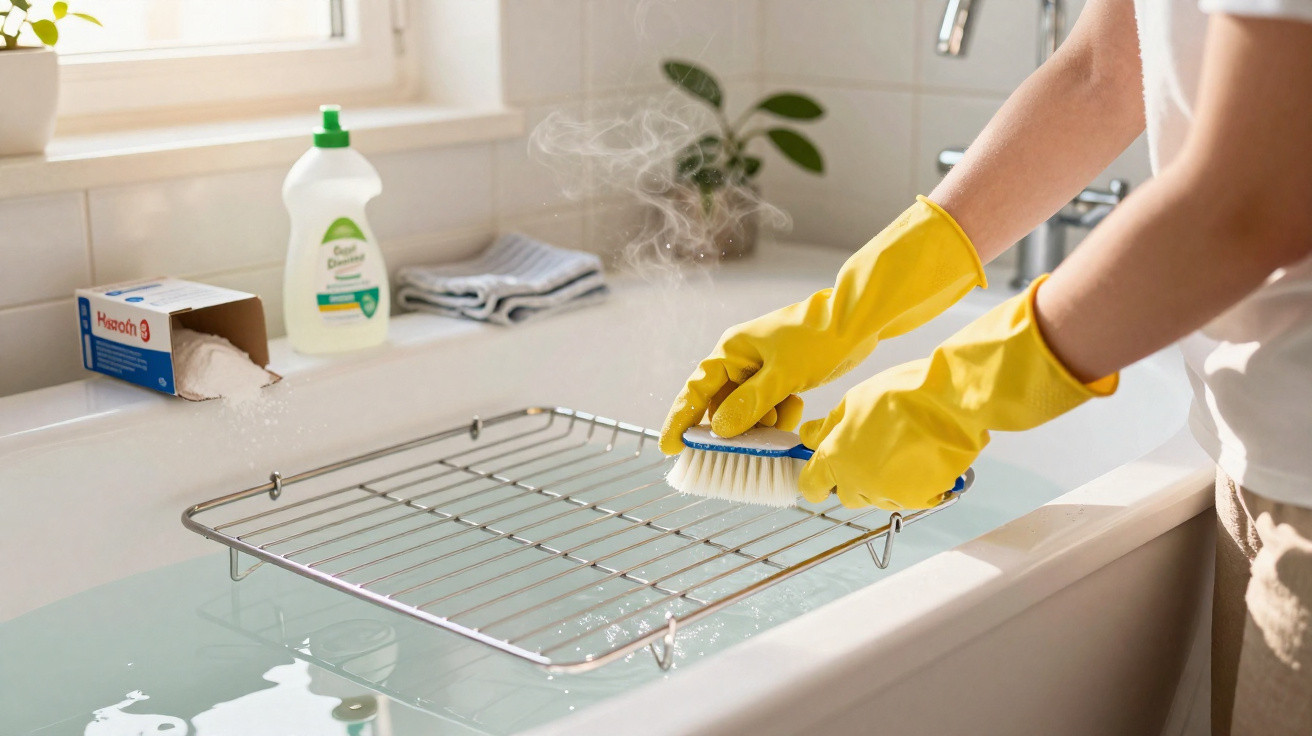
The idea may initially sound almost ridiculous, but it works remarkably well in practice: put the racks in the bath rather than the sink. The benefit is obvious – space. A bath allows the metal racks to lie completely flat and be covered fully with water.
To avoid damaging the bath enamel, use a simple protective layer. Place an old thick towel or a worn-out bath mat on the bottom of the bath first, then set the racks on top. This prevents scratches and considerably reduces the unavoidable clattering when putting the racks in and taking them out.
“The bath provides exactly what oven racks need: plenty of room, hot water and time to soak – without harsh chemicals.”
Which ingredients really remove baked-on residue
There is no need for specialist products from the DIY shop for this cleaning mixture. You will normally already have everything at home:
- very hot water
- bicarbonate of soda or traditional washing soda
- a powerful grease-cutting washing-up liquid
Hot water softens burnt-on deposits and breaks up the grease structures. The soda acts as a mild abrasive as well as a chemical grease remover. Washing-up liquid targets fats and separates them into smaller particles that can then be rinsed away easily.
A tried-and-tested proportion is roughly 150 grams of soda to around 50 millilitres of washing-up liquid per bathful, depending on the amount of water and how dirty the racks are. The quantities do not need to be exact to the millilitre, but the water should look clearly soapy and slightly cloudy.
Step by step: how to clean oven racks
1. Prepare the bath
First lay down the protective towel, then place the oven racks in the bath. Try to keep the bars side by side rather than stacked on top of one another, so that water can reach every area.
2. Fill with hot water
Fill the bath with the hottest water possible until the racks are entirely below the surface. If your bath is particularly delicate, begin with warm water and gradually increase the temperature once the metal racks are already submerged.
3. Stir in the cleaning mixture
Scatter the soda generously over the water and add the washing-up liquid. Gently move the water with your hand or the shower head until the ingredients have dispersed slightly. There is no need to create mountains of foam; a light lather is enough.
“The combination of heat, soda and washing-up liquid alone is enough – vigorous scrubbing becomes a minor part of the job.”
4. Do not underestimate the soaking time
Leave the racks in the solution for at least 30 minutes. For normally dirty racks, this is often entirely sufficient. If they have been neglected for years and have thick, dark layers of residue, it is better to leave them in the bath for several hours or overnight.
During this time, much of the build-up loosens without any effort. Grease and small particles can often later be seen floating on the surface of the water.
5. Finish with a sponge or brush
After soaking comes the actual “work”, although it is surprisingly easy. Rub the racks with a soft sponge or a brush that is not too stiff. In many places, light pressure is all that is needed to wipe away the deposits.
If a few particularly stubborn spots remain, go over those areas once more with the brush. Steel wool and rough metal scouring pads are not ideal for coated racks, as they can roughen the surface.
6. Rinse thoroughly and dry
Finally, rinse the racks with clean water until no soap residue is visible. Drying them with a towel or tea towel prevents water marks and helps prevent rust forming on cut edges. Once fully dry, the racks can go straight back into the oven.
Less effort, more effect – why this method is so popular
Its biggest advantage is the relief it offers: rather than scrubbing at the sink for an hour, the mixture does the work on its own in the bath. Your own contribution is limited to a few simple steps and several minutes of finishing work.
The protective coating on many oven racks remains intact because intensive scrubbing is unnecessary. The metal can shine again without looking dull. It also avoids harsh oven cleaners, which often have a strong smell and can irritate the airways.
| Method | Effort | Risk to the material |
|---|---|---|
| Harsh oven cleaner | medium to high (scrubbing, soaking time) | high (corrosion and discolouration possible) |
| Dry steel wool | very high (pure physical effort) | very high (scratches, dull surfaces) |
| Bath method with soda | low (soaking, brief finishing work) | low (gentle ingredients) |
How often oven racks should really be cleaned
A sensible schedule depends largely on how you cook. If you regularly prepare roasts, cheese-topped bakes and fatty dishes in the oven, soak the racks about once a month. For occasional oven use, an interval of three to four months is often enough.
A useful guide is this: as soon as dark, sticky streaks appear or the rack feels noticeably greasy to the touch, it is time for the bath method. Cleaning straight after an especially lavish meal prevents fresh layers from baking into older, hardened crusts.
Health and environmental considerations: more than appearance
Heavily burnt-on residue can create unpleasant smells at high temperatures. In extreme cases, particles can enter the air inside the oven and come into contact with food. A clean surface reduces this risk and helps keep oven odours neutral.
The soda and washing-up liquid method needs no aggressive solvents and can be disposed of down the drain without difficulty. Soda is considered readily biodegradable and has been used in households for decades. Choosing a particularly environmentally sensitive washing-up liquid reduces the environmental impact even further.
Practical everyday kitchen tips
- Wipe fresh splatters from the rack immediately with a damp cloth before they can bake on.
- For particularly fatty dishes, slide a baking tray beneath the rack to catch drips.
- Once a year, clean the oven’s side rails using the same method.
- If you have sensitive hands, wear thin household gloves while brushing, as soda removes grease effectively.
Anyone who tries this method once will quickly find that it is easy to fit into everyday life. Put the racks in the bath in the evening, add the mixture, turn off the light – and by the following morning only a few simple steps remain. You can clean the bathroom or kitchen at the same time while the mixture quietly works in the background.
There is another interesting side effect: many users report using their oven more often once it is clean and no longer smells unpleasant. Clean oven racks are therefore not just about appearance; they can directly influence cooking habits and the desire to bake.

Comments
No comments yet. Be the first to comment!
Leave a Comment