
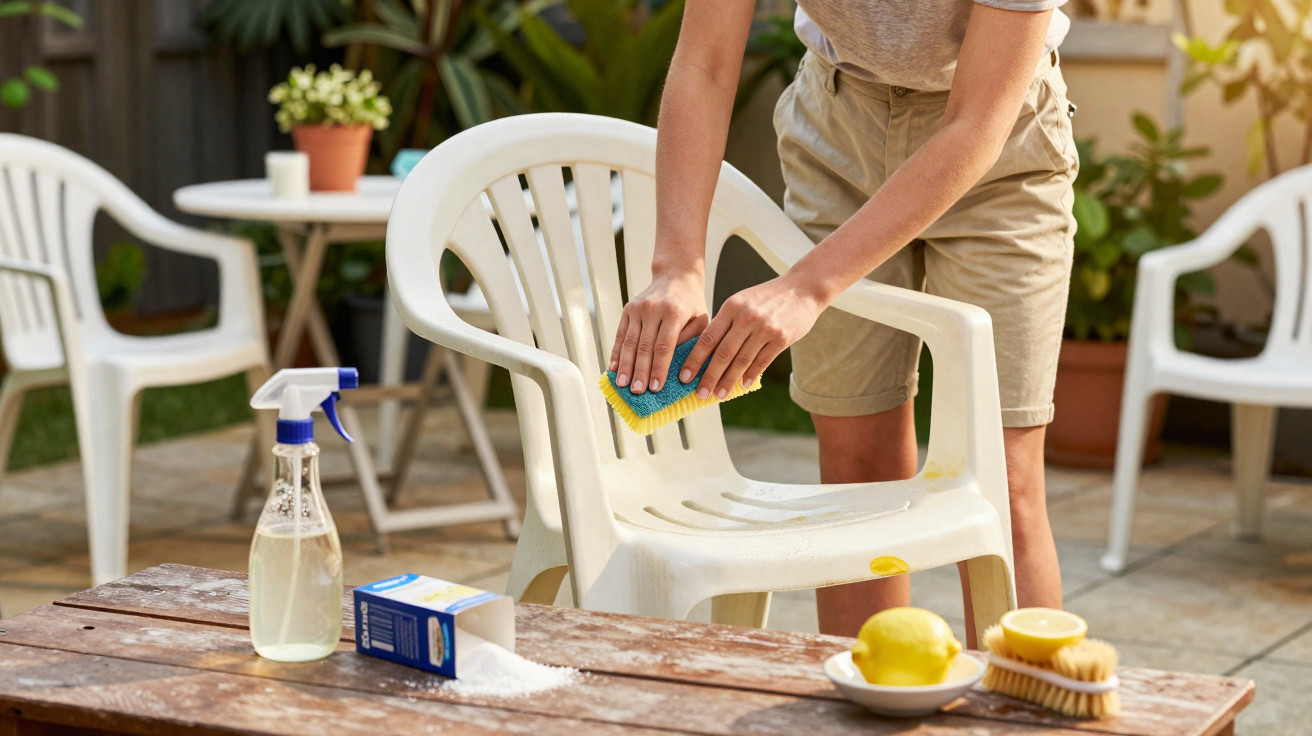
A small household trick can still be genuinely encouraging.
Plenty of chairs look older than they are after just one winter. Sand, UV light, damp and microalgae all take their toll. With a straightforward blend of everyday ingredients, you can bring back a surprising amount of shine - no specialist equipment and no repainting required.
Why plastic garden furniture turns grey so quickly
UV radiation breaks down polymers at the surface and leaves it slightly roughened. That rough texture looks porous and picks up grime more readily. Moist conditions encourage green staining, mould and black specks. Even relatively new sets made from PVC or polyrattan can end up looking dull after a wet season.
Dirty or damaged: a quick check
If it’s only dirty, you’ll see a dull film, green residue and yellowish shadows, but the surface still feels smooth. If it’s deeply damaged, it will wipe off like chalk, feel crumbly, or show cracks. A backrest with a tear often only looks as if it’s holding together.
If there are structural cracks or a crumbly surface, safety comes first: a weakened plastic shell can snap suddenly under load and should be disposed of.
The kitchen-cupboard mix for dull and yellowed plastics
This effective combination uses warm water, vinegar, a little soap and a pinch of bicarbonate of soda. It tackles limescale, neutralises organic residues and does so gently.
Ingredients and quantities
- 3 litres of warm water
- 250 millilitres of clear household vinegar (5–8%)
- 3 tablespoons of bicarbonate of soda (baking soda)
- 1 generous squirt of liquid soap, soft soap, or mild washing-up liquid
- Optional for heavily yellowed white items: a little washing soda, or clay stone used in small spots
Mix the water and soap first, then stir in the vinegar, and add the bicarbonate of soda last. The mixture will foam briefly - use it straight away and do not store it in an airtight container.
How to do it
- Sweep away dust and cobwebs with a dry brush. Use a soft brush to work into joints and gaps.
- Apply the solution generously and work in the shade so it doesn’t evaporate too quickly.
- Leave for 10–15 minutes. During this time, the acid and surfactants loosen the build-up.
- Wipe with a soft sponge, following the direction of the surface texture. Use an old toothbrush for corners.
- Rinse thoroughly with clean water. Mop up remaining water with a microfibre cloth.
White or coloured: small differences, big impact
On white furniture, a little extra bicarbonate of soda acts like a gentle polish. For isolated yellow patches, dampen briefly with washing soda, then rinse off promptly. On coloured surfaces, cut back the bicarbonate of soda so pigments don’t end up looking flat; here, the water, vinegar and soap do most of the heavy lifting.
Avoid common mistakes
- Don’t use chlorine bleach, harsh solvents or descalers: they can strip colour or weaken the material.
- Avoid scouring pads, wire wool or metal brushes: micro-scratches make the surface even more prone to dirt.
- Use a pressure washer only with care and from a distance - never aimed at already degraded areas.
- Don’t use cooking oil for “shine”: it leaves a sticky film that attracts dust.
Never combine vinegar with chlorine-based cleaners. This creates toxic chlorine gas. Always rinse away residues with plenty of water.
A routine that keeps the shine
Seasonal care plan
- Every two weeks: a quick wipe with warm soapy water, then dry.
- After heavy rain: squeegee off water and dry to prevent water marks.
- In summer: park under a parasol, shade sail or pergola where possible. Less UV means slower ageing.
- In autumn: clean thoroughly, dry completely, then store under a cover or in the garage/basement.
Quick help at a glance
| Problem | Mix adjustment | Contact time | Tool |
|---|---|---|---|
| Grey film, dust | Basic recipe | 5–10 min. | Soft sponge |
| Green deposits | Slightly more vinegar | 10–15 min. | Soft brush |
| Yellowed white | More bicarbonate of soda, spot-treat with washing soda | 15 min. locally | Microfibre cloth |
| Coloured but dull | Less bicarbonate of soda | 10 min. | Sponge, plenty of rinsing |
Why the mix works
Vinegar dissolves limescale marks and mineral particles that help deposits cling. Soap lifts greasy films off the surface and keeps loosened dirt suspended in the liquid. Bicarbonate of soda buffers the acidity, provides mild abrasion and helps shift organic residue. Warm water speeds everything up and allows surfactants to work more effectively.
When cleaning is no longer enough
If the surface has gone chalky and degraded, the visual improvement will be limited. A plastic restorer from the car-care aisle containing UV blockers can deepen the colour and smooth the finish. On heavily weathered pieces, a plastic adhesion primer plus exterior-grade paint may be needed. Load-bearing parts with cracks should be retired, because cosmetic fixes won’t prevent a break.
Safety, environment, practicalities
- Shield plants from splashes, and don’t direct wastewater into ponds.
- Wear gloves, especially when using washing soda. The powder is alkaline.
- Don’t mix vinegar and bicarbonate of soda in sealed bottles. The gas produced builds up pressure.
- Test every step on an inconspicuous spot first to see how the plastic reacts.
Also useful: know the material, save money
Garden furniture is usually made from polypropylene, PVC or a painted ABS blend. Polyrattan (plastic weave) also tolerates the solution above, but you’ll need a brush rather than a sponge to get into the weave. Painted surfaces are more sensitive - work more gently and avoid washing soda.
The financial benefit is clear. A family plastic set can easily cost €150–€400. The vinegar, soap and bicarbonate of soda mix comes in at under €1 per clean. Two hours of manual work and a tub of solution can often restore that “like new” effect - while also saving resources, packaging and transport.

Comments
No comments yet. Be the first to comment!
Leave a Comment