
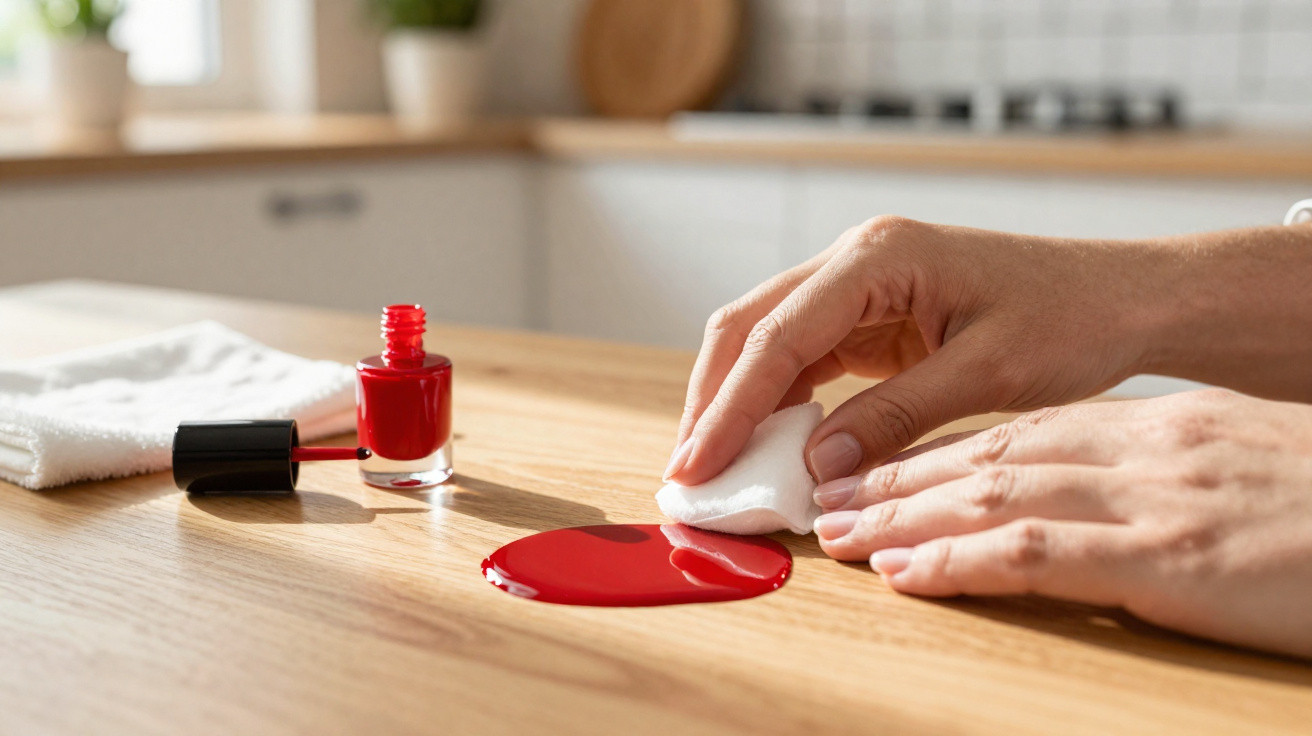
The first scream came from the kitchen. Then there was that brief, heavy silence where everyone instantly knows: something has gone properly wrong. On the white worktop sat an iridescent, pink puddle of nail polish, thick as syrup, with little runnels creeping towards the join. Next to it: a friend’s hand, frozen in place after the bottle slipped during a frantic phone call. For a second, nobody moves. Then someone lunges for kitchen roll, water-anything. And that’s usually the moment the real damage starts.
Why nail polish stains are so tricky
Anyone who’s never “decorated” a nearly new wooden chest of drawers with a single drop of red polish tends to underestimate how ruthlessly that glossy colour sinks into every pore. On smooth surfaces it can look almost harmless-nearly like an accidental design feature. On fabric or open-grain wood, though, the very same polish behaves like a guest who refuses to leave.
After all, nail polish is designed to cling to keratin for days, even with repeated handwashing, shampoo and washing-up liquid. So it’s hardly surprising that laminate, for instance, doesn’t give up the stain gracefully.
There are familiar “oh no” scenarios: the bottle tips over during a Netflix night and hits the sofa; a child’s foot marches straight through a fresh splodge on the tiles; a brush slips and lands in a perfect spatter pattern across the bathroom mirror. People laugh about it later-before that, they’re desperately searching “remove nail polish without damage”. Many reach for acetone on autopilot because it works so well on nails. Insurers’ damage reports, though, are full of the aftermath: etched surfaces, discoloured carpets and wrecked wood finishes are becoming almost routine. It’s just not something people talk about much.
Once you remember what you’re dealing with, the chaos makes a strange kind of sense. Nail polish contains film-formers, resins, colour pigments and plasticisers-made to cure clear and hard, and then stay stubbornly unimpressed by friction, water and soap. Harsh solvents may soften the polish, but they often attack the material underneath at the same time. Water can spread the stain and drive it into fibres. Simply wiping tends to smear pigments like watercolour.
The goal isn’t to get rid of the polish by any means necessary; it’s to separate it from the surface before the surface pays the price.
Specific methods for different surfaces
The opening move is always the same: breathe, and stop anything that makes the mess worse. No water. No frantic scrubbing. No all-purpose cleaner out of habit.
On smooth, non-porous surfaces-tiles, glass, ceramic or stainless steel-you’ve usually got the best chance. If the polish is still soft, carefully lift it with a paper towel or an old plastic card. Think “lift” rather than “wipe”, so you don’t turn one spill into a thin pink film. If it’s already dry, a cloth dampened with alcohol often works well. Isopropyl alcohol (or standard disinfectant/rubbing alcohol) is slower than acetone, but it’s far kinder to grout and coatings.
A common mistake is treating every material the same way. We all know that moment of thinking: “If I just rub hard enough, it’ll go.” On wooden tables or parquet, that’s the quickest route to dull patches and ugly tide marks. A gentler, layered approach is safer.
Start by easing up the dried polish with a wooden spatula or plastic scraper, lifting it bit by bit without scratching the finish. Then use a soft cloth and a tiny amount of mild, acetone-free nail polish remover-or neat alcohol-only on the spot itself. Let it sit briefly, then dab away; don’t rub. Honestly, nobody does this perfectly every day, but this patience is exactly what saves you serious money later.
Textiles and carpets are a different game: don’t spread-contain. On carpet, first use a spoon to nudge the polish from the outside towards the centre, limiting how much can sink into the pile. If you can, slide a white cloth underneath the affected area. Then dab (never soak) with acetone-free remover or alcohol so the colour doesn’t bleed downwards. Sometimes, professional carpet cleaning ends up cheaper than trying to “scrub it all out” with aggressive chemicals. However you look at it, polish is tougher than cotton.
When it gets delicate: rescue with finesse instead of hard scrubbing
Some surfaces show permanent scars after a single drop of the wrong chemical: varnished wood, acrylic baths, plastics and matt kitchen fronts. With these, the rule is simple: use as little solvent as possible, and rely on careful lifting as much as you need.
If the nail polish has already dried, gentle heat can sometimes act like a key. Set a hairdryer to a low setting and warm the area from a distance until the polish softens slightly. Then lift the edges with a wooden stick or an old bank card. Pause, warm again lightly, and free the next millimetre. It’s almost meditative-and surprisingly effective-because the surface itself stays largely undisturbed.
The urge to grab the strongest product straight away is completely human. When it’s a designer table or a brand-new bath, you want the mark gone in a minute. That’s where most long-term damage happens: dull rings, softened coatings, roughened patches that attract dirt faster afterwards. If you’re unsure, test any cleaner in a hidden spot first-the back of a panel, the underside of a worktop, a corner near the edge. Wait briefly, wipe, and check. It sounds obvious, but it can stop a 20-second issue becoming a £2,000 problem.
Sometimes you need a few blunt sentences to quieten the inner cleaning perfectionist.
“Not every mark has to disappear in ten minutes. Some stains come out better in three stages-and then they don’t leave a story behind on the surface.”
- Start gently: Always begin with the mildest option-lift mechanically, then alcohol; only consider stronger solvents as a last step.
- Work precisely: Treat only the stain; don’t flood the whole area. Small cotton pads or cotton buds help you stay targeted.
- Build in check-ins: After each step, let it dry briefly and inspect in daylight before you go again.
What’s left once the stain is gone
When the pink sheen has finally vanished and the table looks normal again, what remains is often more than a clean surface. You suddenly notice how delicate everyday materials can be. High-gloss units, soft-touch coatings, oiled wood-beautiful, yes, but unforgiving when a small brush slips.
A nail polish stain becomes a mini lesson in materials: glass generally tolerates alcohol; wood dislikes wide-area solvents; fabrics remember every panicked rub.
It also changes how you see those endlessly “perfect home” photos in magazines and social feeds-no splashes, no dents, no smeared pink anywhere on the floor. Real life isn’t like that. Real life includes children experimenting with glitter polish, shared-flat bathrooms with nowhere to put anything, and girls’ nights with Prosecco and five open bottles on the coffee table. If you learn to handle these marks more calmly-and remove them precisely when you need to-you take mishaps less personally. The mindset shifts from “Don’t make a mistake” to “Right-how do we fix this?”
And that may be the quiet bonus of every nail polish disaster on a surface: your attention moves from the flawless façade to the process behind it. The patient hand, the test spot in a hidden corner, the moment someone says, “Wait-let’s check before we start scrubbing.” That attitude doesn’t just save floors and tables. It also defuses the small everyday dramas that would otherwise echo for hours. At best, you’re left with a barely visible shadow-and a story you’ll tell, laughing, at the next girls’ night.
| Key point | Detail | Benefit for the reader |
|---|---|---|
| Identify the surface | Check the material (wood, glass, textile, plastic) and choose the right approach | Less risk of permanently damaging the surface during cleaning |
| Gentle methods first | Lift mechanically, use alcohol, and reserve aggressive solvents for the final stage | Removes stains without dull rings and discolouration |
| Patience and stages | Work in several passes, letting it dry between steps and checking progress | Better results with less stress and lower repair costs |
FAQ:
- How do I remove nail polish from wood without ruining the finish? Carefully lift dried polish with a wooden spatula or a plastic card, taking off pieces without scratching. Then work only on the spot with a little alcohol or acetone-free remover on a cotton bud, and wipe the area dry straight away.
- What should I do if nail polish drips onto the carpet? Don’t rub. Use a spoon to push the polish from the outside inwards. Put a white cloth underneath if possible, then dab with a small amount of alcohol or acetone-free remover. Keep lifting with a clean part of the cloth until no more colour transfers.
- Can I use ordinary nail polish remover on my kitchen worktop? On stone or ceramic it’s usually fine, but be cautious with plastics, laminate and painted surfaces. Test in a hidden area first and apply very sparingly, only where needed.
- How do I get nail polish off glass or mirrors? Pull off fresh polish with a plastic card. Loosen any residue with a cloth dampened with alcohol, let it sit briefly, then wipe away with minimal pressure. Glass generally tolerates far more than wood or plastic.
- What if the stain is old and completely dried? Use slow, layered work: carefully lift mechanically, soften with a small amount of alcohol in between, then lift again. If the material starts to look altered or dull, stop and, if in doubt, bring in a professional.


Comments
No comments yet. Be the first to comment!
Leave a Comment