
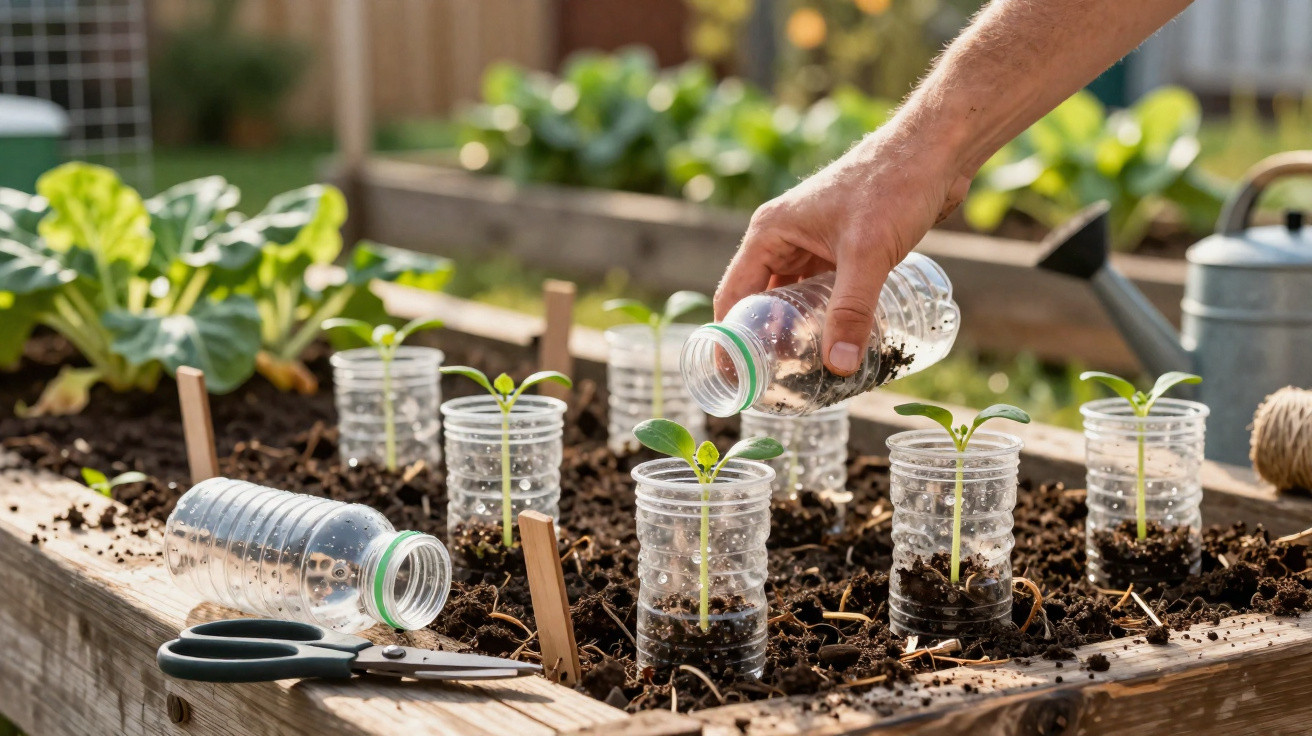
In home vegetable patches and small raised beds, one straightforward method has been winning over people who grow food and flowers at home: using cut plastic bottles to protect seedlings. This DIY approach forms a sort of individual mini‑greenhouse around each young plant, cutting losses caused by insects, strong winds and sudden temperature swings-particularly in the first weeks of growth-while also giving a second life to something that would usually end up in the bin.
Why use cut plastic bottles to protect seedlings?
A plant’s earliest stage is its most vulnerable, and even minor damage to new leaves or the stem can set development back. By turning a bottle into a physical shield, you can separate the seedling from some outdoor threats and create a slightly steadier microclimate.
Clear plastic lessens direct wind exposure, helps the soil retain moisture and adds a gentle boost of warmth overnight-handy for cold‑sensitive varieties. The barrier also makes it harder for slugs, snails, ants and small rodents to reach the plant, and it softens the force of heavy rain so water is less likely to snap the stem or bury young leaves.
How to cut and position plastic bottles to protect plants
For this to work well, the bottle needs preparing carefully and the seedling must have enough room. Typically, people use clean, transparent 1.5 to 2 litre bottles. The base is cut off to create a cylinder that fits over the plant, with the neck pointing upwards.
A few simple checks make this protection more effective and safer for seedlings as they put on growth:
- Press the cut edge slightly into the soil-around 2 to 3 centimetres-so the bottle doesn’t topple in the wind.
- Leave enough space inside so the seedling won’t rub against the bottle walls as it grows.
- Use the neck as a ventilation outlet: remove the cap or add small holes to prevent overheating.
- Adjust watering, because soil inside the bottle usually dries out more slowly.
When should you remove the plastic bottle protection from seedlings?
Removal is best done step by step, following the plant’s pace so it doesn’t suffer from sudden changes in temperature or light. In most cases, the cover is most valuable in the first few weeks-until the stem has toughened up and the seedling has several true leaves, reaching roughly 10 to 15 centimetres in height.
A practical routine is to increase ventilation first, then lift the bottle off for a few hours each day, and finally take it away completely. Where pests are a major issue, many growers keep only the bottle’s side ring by cutting off the top section, leaving a low physical barrier that helps deter slugs and snails.
In which situations is the cut plastic bottle trick most effective?
Cut plastic bottles tend to work best in urban gardens, containers and small beds, where each plant can be treated individually. Short‑cycle crops such as lettuce, rocket and radish, along with more sensitive plants like tomatoes and peppers, often benefit noticeably during cold spells or periods of strong wind.
This approach is particularly useful in changeable weather, in areas that get heavy rain or have problems with slugs and snails, and on balconies where reusing materials matters. Combined with basics such as soil preparation, consistent watering and choosing varieties suited to your local conditions, it becomes a genuinely practical tip that improves seedling survival and makes home growing more reliable.
Comments
No comments yet. Be the first to comment!
Leave a Comment