
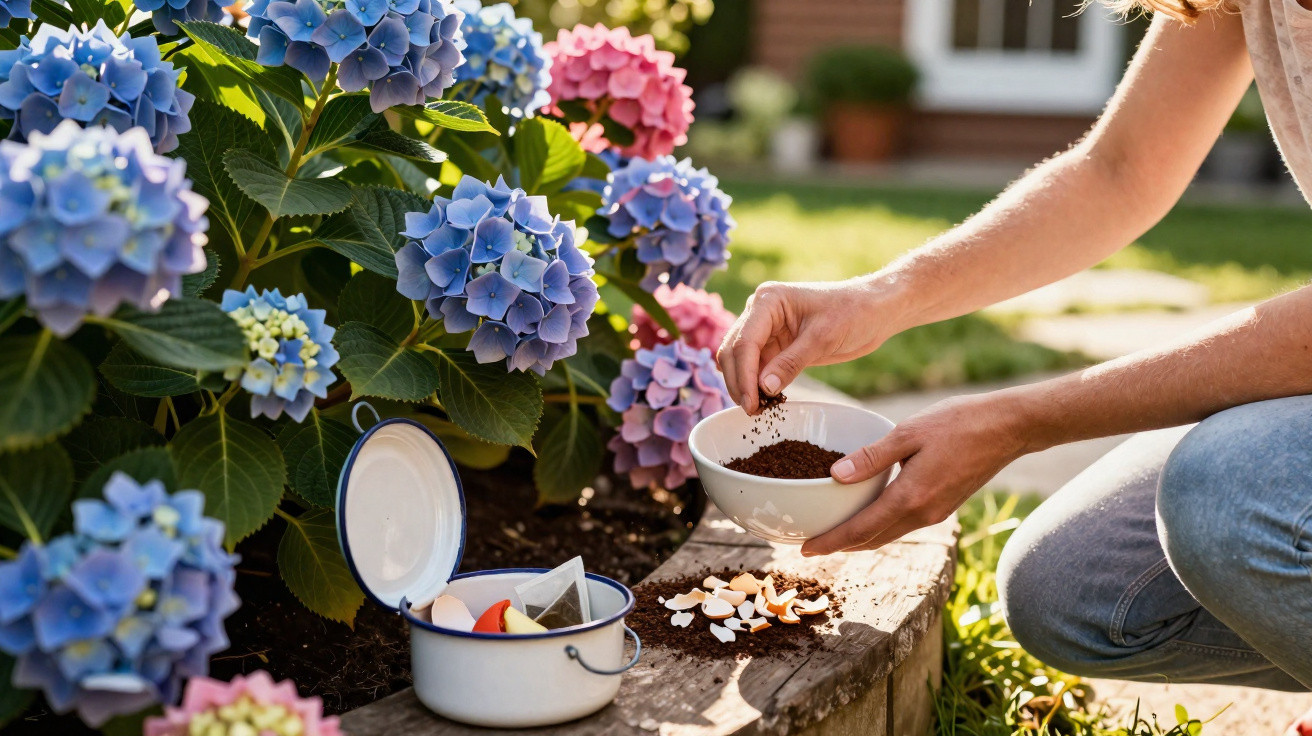
With one simple kitchen trick, they can suddenly look like a different plant.
Anyone growing hydrangeas in a border or in pots will recognise the moment: instead of full, showy blooms, the shrubs start to look tired. You might reach for pricey specialist feed, envy the neighbour’s plants, or blame the weather. Yet a remarkably effective aid is often sitting on the kitchen worktop - and usually ends up in the bin.
Why many hydrangeas struggle in the garden
Hydrangeas are classic acid-loving (ericaceous) plants. They prefer soil that is slightly acidic and rich in humus. In many gardens, however, the ground is quite chalky. That pushes the pH up too far, which then makes it harder for the plant to take up key nutrients.
You’ll often notice this through several tell-tale signs:
- Leaves turn from fresh green to pale green or yellow.
- Veins frequently stay darker - a typical sign of nutrient shortage.
- Flower heads are smaller and look sparse.
- Overall growth becomes noticeably weaker.
Many amateur gardeners immediately suspect iron deficiency or assume they have a “poor” variety. Often, though, the underlying issue is simply an unsuitable pH. When the pH sits in the hydrangea-friendly range - roughly between 5 and 6.5 - nutrient uptake tends to work far more smoothly.
If you gently acidify the soil for hydrangeas, you help the roots and support stronger flowering over the long term.
The hidden potential of orange peel
A surprisingly helpful ingredient is found in an everyday kitchen leftover: orange peel. Instead of heading for the food waste caddy, it can be used as part of a mild, natural fertiliser for plants that appreciate slightly acidic soil.
Orange peel contains modest amounts of potassium, magnesium and calcium. These minerals help support sturdy leaves and more stable flower heads. Even more interesting for hydrangea growers is that orange peel, as a mildly acidic organic addition, can improve the soil environment over time.
In beds with a more chalky base, this approach can gradually create a better-suited zone around the root area. It won’t transform things overnight, but with regular use the improvement is often noticeable.
How to prepare orange peel properly
A common mistake is scattering fresh pieces on top of the soil. It may smell pleasant briefly, but it does little for the plant and can quickly attract small flies. Thick, fresh peel also breaks down very slowly.
A two-stage method works far better:
Step 1: dry it thoroughly
First, the peel needs to dry out completely until it is hard and brittle. There are two straightforward options:
- Spread it out on a tray or plate and leave it for a few days in a warm, airy room or in the sun.
- Dry it in the oven at a low temperature (for example 60–80 °C), leaving the door slightly ajar and watching carefully so it doesn’t brown.
Only when the peel truly crackles and snaps easily is it ready to use in the border.
Step 2: chop or grind
Next, use a blender, pestle and mortar, or even an old chopping board. You can whizz the peel into a coarse powder or chop it very finely. The smaller the pieces, the faster soil organisms can work on it and the more evenly the effect is spread.
Properly dried and finely crushed orange peel is the foundation for a free, natural hydrangea feed.
Use: how often hydrangeas benefit from orange peel
Once your “fertiliser” is prepared, the key is applying the right amount. It pays to be restrained, because overdoing it can upset the nutrient balance.
This is a well-tested routine:
- During the growing period from April to August, apply a thin layer about once a month.
- For a medium-sized shrub, a small handful of powder or finely chopped peel is enough.
- Spread it in a ring around the root area, rather than piling it against the stems.
- Lightly cover with soil or well-rotted compost so it doesn’t blow away.
- Then water thoroughly.
The crushed peel doesn’t act like a quick-fix fertiliser. Instead, it functions more like variety-appropriate soil care: soil life breaks it down and releases nutrients gradually.
Which additional steps strengthen the effect
Orange peel alone won’t completely “fix” extremely chalky ground. It works best as one element within a broader set of measures that suit hydrangeas.
Helpful companions in the border
The most effective approach is combining it with other commonly recommended steps:
- Leaf mould: improves structure and adds extra organic matter.
- Bark mulch or pine needles: help retain moisture and, over time, contribute to a more acidic soil.
- Rainwater for watering: reduces additional lime being introduced via tap water.
- Ericaceous compost when planting or repotting.
Used this way, orange peel shows its strengths most clearly. It supports an already hydrangea-friendly setting and helps keep plants vigorous.
How quickly do visible changes appear?
If you start using orange peel today, don’t expect dramatic results within a week. Organic approaches take time. The first encouraging signs usually show after a few weeks to a few months:
- New growth looks a richer green.
- The plant forms more buds and the foliage fills out more densely.
- Flower heads stay firm for longer and flop less quickly.
It often gets particularly interesting in the second year of use. By then, the soil around the plant has changed more noticeably, and the hydrangea can make much better use of its potential.
What to watch out for when using orange peel in the garden
As handy as this trick is, there are a few points worth keeping in mind. Citrus peel contains essential oils, which - when fresh and used in larger quantities - can disturb some soil organisms. Thorough drying reduces this effect significantly.
If you have a small garden but produce a lot of peel at home, it’s better to spread it across several beds or add some to the compost heap. There it helps create a loose, crumbly texture without concentrating too much in one spot.
Take extra care with container plants: the volume of compost is limited, so the impact is stronger. For hydrangeas in pots, a very light sprinkling every six to eight weeks is sufficient. If you’re unsure, begin with a tiny amount and watch how the plant responds over the following weeks.
Why hydrangeas prefer acidic soil
Many gardeners know hydrangeas do better in “acid soil”, but not necessarily why. The explanation lies in nutrient chemistry. Trace elements such as iron and manganese are far more available to plants in a slightly acidic range. If the pH rises too much, these elements become locked up in the soil and no longer reach the plant.
There’s also this: the typical soil life in humus-rich, mildly acidic conditions breaks down organic matter particularly efficiently. That creates a steady supply of plant-available nutrients. So, by regularly working in organic materials such as leaves, compost, bark mulch and, yes, orange peel, you reinforce that system. The results show directly in flower abundance and colour intensity.
For garden growers, that means it’s not only about short-term feeding. In the long run, the soil environment determines whether a hydrangea truly becomes a bright focal point in the border. A seemingly ordinary kitchen leftover can make a surprising difference - with no extra cost and the added benefit of producing less waste.


Comments
No comments yet. Be the first to comment!
Leave a Comment