
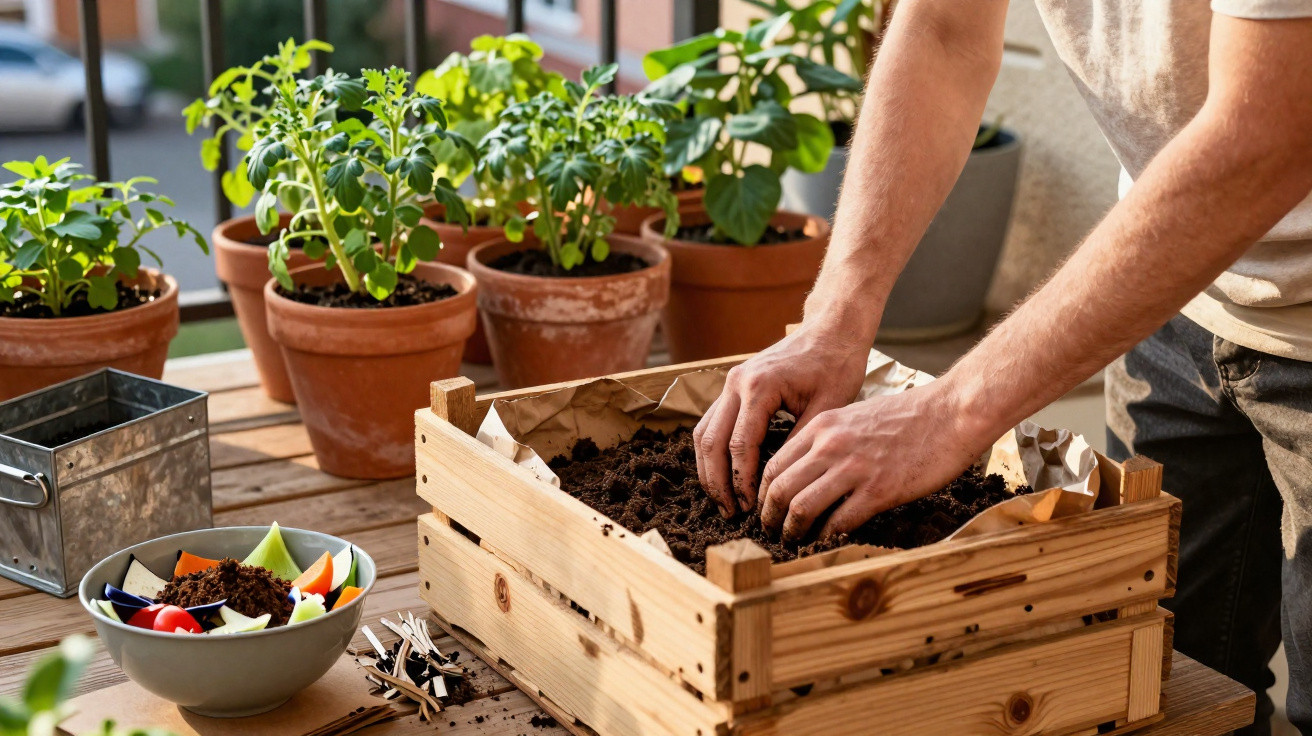
If you prep your beds in spring, you’ll probably find yourself in a DIY store staring at pallets stacked with bags of potting compost. It’s convenient, no doubt. Yet that easy pick-up has knock-on effects for the environment, your budget and the quality of your soil. At the same time, there’s a surprisingly straightforward way for capable gardeners to produce excellent compost at home - with no specialist knowledge and no major spend.
Why bought potting compost hides an environmental problem
Most bagged composts look harmless at first glance: a black, crumbly material in a plastic sack, ready to use. But many products are linked to serious damage to sensitive habitats.
A central issue is the high proportion of peat. Peat comes from peatlands - landscapes that have formed over thousands of years and lock away huge amounts of carbon. Once peat is extracted, part of that stored carbon is released into the atmosphere as CO₂.
"With every bag of peat-based potting compost, extra climate-gas emissions end up in your trolley - completely invisible, but real."
There’s also the impact of long haulage distances: compost is heavy, and lorries burn a lot of diesel moving it around. Every trip adds emissions. On top of that come plastic bags, which are often not recycled and can persist as litter for a long time.
If you skip industrial bagged compost, you reduce your personal carbon footprint. Your garden can be tended far more resource-efficiently without harming yields - and in many cases plants actually grow more vigorously in a well-balanced home mix.
Home-made compost: easier than most people think
To many, the idea sounds like an eco experiment: mixing your own potting compost - can it really work? People who do it day in, day out say yes, and it’s far simpler than you’d expect.
The key ingredient is ordinary compost. What you already generate in the kitchen and garden as “waste” becomes the foundation for a nutrient-rich feed for your beds:
- vegetable and fruit scraps, peelings and cores
- coffee grounds and tea bags with no plastic content
- crushed eggshells
- faded flowers and soft plant trimmings
Instead of going in the general waste bin, these materials belong in a compost bin or compost heap. They break down into a loose, dark, crumbly humus packed with nutrients and micro-organisms.
To turn that into genuinely good potting compost, you’ll also need dry ingredients alongside the “wet” kitchen material. These are especially reliable:
- fallen leaves from autumn
- shredded twigs and prunings
- unbleached cardboard with no colourful printing (for example, delivery boxes)
When you combine these elements well, you can produce, within a few months, a compost that is airy, nutrient-rich and remarkably versatile - suitable for everything from a raised bed to balcony planters.
Getting the mix right: how to build a powerful growing medium
Success largely comes down to the balance of ingredients. Gardeners often talk about “green” and “brown” materials:
| “Green” (high nitrogen) | “Brown” (high carbon) |
|---|---|
| vegetable and fruit scraps | fallen leaves |
| fresh grass clippings | cardboard, plain paper with no colour |
| coffee grounds, used tea | shredded woody material, small twigs |
Using roughly equal amounts from both groups speeds up decomposition and helps prevent unpleasant, rotten smells. Too much “green” can create a slimy, smelly heap. If “brown” dominates, the process drags on.
"Rule of thumb from practice: whenever you have lots of kitchen scraps, add a layer of leaves or cardboard on top."
Air is just as important. Compost needs to breathe. If you turn it with a garden fork or use an aerator every two to three weeks, you supply oxygen to the micro-organisms. That can noticeably shorten the time to maturity and keeps the texture open and friable.
Using structure builders for ideal garden compost
In many places, soils are heavy and clay-rich. Water can sit around, and roots don’t get enough oxygen. Here’s a simple technique experienced gardeners use almost automatically: adding a portion of washed, sieved sand (from a DIY store or a gravel yard) to the compost improves the structure in a tangible way.
If you want to fine-tune the mix further, you can also add:
- wood fibres or shredded bark to increase looseness
- rock dust to top up trace elements
- a little mature garden soil to “inoculate” the mix with micro-organisms
Step by step, you end up with a growing medium that can easily compete with high-quality bagged products - just without peat, without plastic packaging and without long lorry journeys.
Moisture, time, patience: three quiet success factors
Composting only works when conditions are right. If the heap is too dry, it effectively stalls; if it’s too wet, it can start to rot. The ideal is like a wrung-out sponge: damp, but not dripping.
During prolonged dry spells, a little water can keep things moving. Water thoroughly once, then cover with leaves or cardboard so the moisture doesn’t vanish straight away.
How long it takes for scraps to become finished compost varies with temperature and the mix. Summer speeds it up; winter slows it down. After around three to nine months, you’ll usually have a dark, crumbly material in which the original ingredients are barely recognisable. At that point, it’s suitable as a base for potting compost, bed soil or general planting mix.
Less waste, more results: why home compost pays off twice
If you can make room for a compost bin in the garden or yard, you immediately cut the volume of your general waste. Kitchen scraps that once went in the bin become a valuable resource. Many local authorities even encourage this indirectly through lower waste costs.
At the same time, spending at the garden centre drops. Anyone with larger beds knows the sting at the checkout when multiple sacks of compost are piled into the trolley. Home-made mixes can save noticeable money year after year.
"Perhaps the biggest reward: the good feeling when strong tomatoes, roses or perennials grow in compost that came straight from your own bin."
Many hobby gardeners also find that making compost improves their understanding of soils, nutrients and plant development. You can see, smell and feel scraps turning into fertile growing medium - a process that remains completely hidden when you only buy bags.
Practical examples: how to use your home-made compost
Depending on what you’re growing, you can blend mature compost in different ways. Three common options from real-world use:
- For vegetables in a bed: roughly one third compost and two thirds existing garden soil. Work the mix into the soil around the plants.
- For container plants: half compost, one quarter garden soil, one quarter sand or wood fibres. This creates an airy substrate with enough nutrients.
- For sowing seeds: mature, sieved compost mixed with the same amount of sand. That way young roots aren’t “burnt”, while still getting sufficient nourishment.
If you notice plants producing lots of leafy growth with little else, reduce the compost proportion slightly. If growth stays pale and weak, it can help to add an extra boost by spreading a thin layer of compost on the surface.
What many people overlook: risks and easy ways around them
Of course, composting can go wrong. A few simple precautions prevent the usual pitfalls:
- Use cooked food scraps very sparingly, as they can attract rats.
- Put diseased plant material in the general waste to avoid spreading fungal spores and pests.
- Keep heavily printed cardboard and any packaging films out, due to possible contaminants.
Beginners in particular do well to start small and watch what happens. Your nose and eyes are reliable guides: if the heap smells musty, the issue is usually airflow or moisture. If it looks grey and dry, it needs water and fresh material.
Why switching now is especially worthwhile
With energy costs rising and concern growing about climate and resources, even small actions matter. Making your own potting compost is a practical, everyday step with results you can see directly in your own garden.
If you start a basic compost setup now, you can replace a large share of bought bags by the next gardening season. Cutting out industrial compost means less peat extraction, less plastic, less lorry traffic - and, at the same time, tougher, healthier plants.
Many gardeners who switch once never go back. The approach is simple, adaptable and works from a small city balcony to a large country garden. The only thing that matters is taking the first step: set aside a spot, start collecting - and let the compost do the work.



Comments
No comments yet. Be the first to comment!
Leave a Comment