
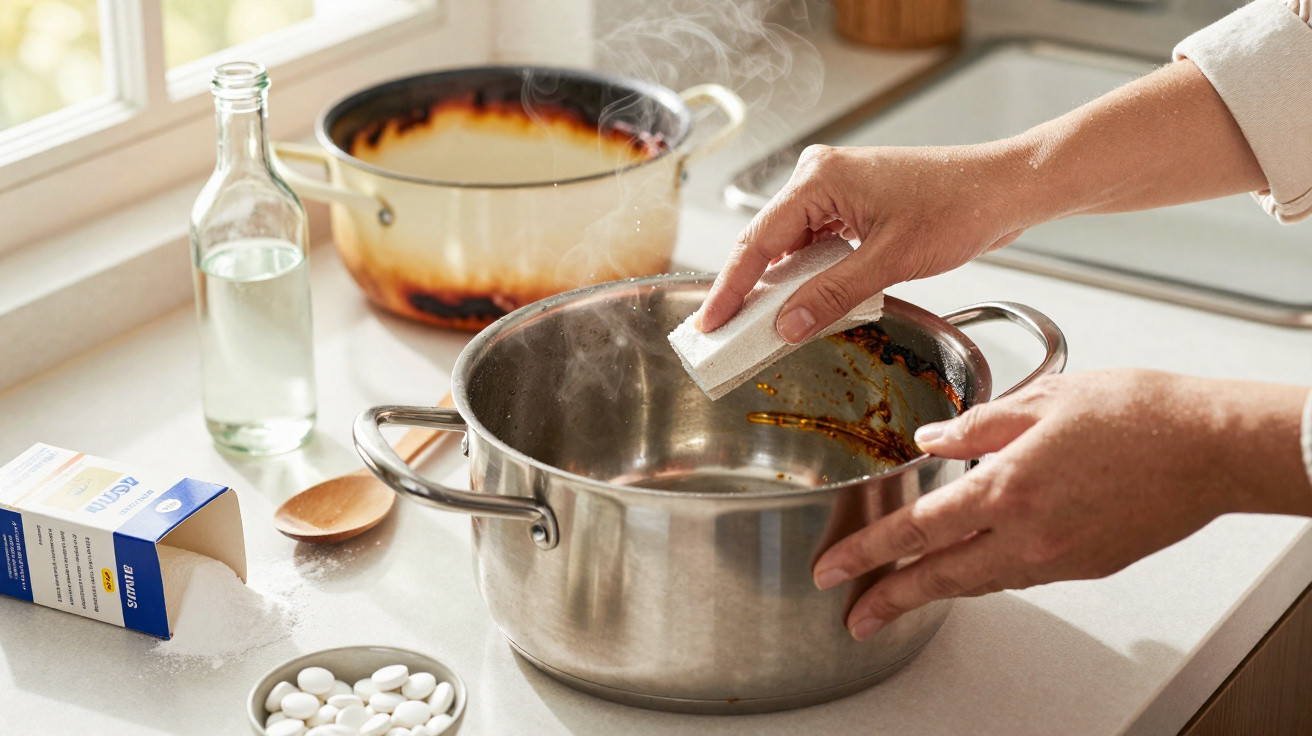
A saucepan that used to gleam can end up looking like it belongs in a kitchen catastrophe film - and sometimes, the more you scrub, the worse it seems to get.
Plenty of home cooks simply put up with greasy sides, stains and burnt-on patches as an unavoidable part of daily meals. But with a handful of basic cupboard staples - and a little help from simple chemistry - well-used pans can often be brought back to something surprisingly close to their original look.
Why your pots lose their shine so quickly
Even when you’re careful, normal cooking leaves traces behind. Oil splashes up the walls and gradually bakes on. Starchy foods can caramelise. Tomato-based sauces leave stubborn stains. High heat can tint and dull metal. Given enough time, even good-quality cookware can start to look tired.
It isn’t only about appearance, either. A thin film of grease can hold on to smells. Burnt residue can create hot spots and contribute to uneven results. In response, people often scrub harder with metal scourers or turn to strong oven-style sprays.
Aggressive scouring and harsh chemicals can damage non-stick coatings, scratch stainless steel and shorten the life of your cookware.
The upside is that you usually don’t need specialist products to shift everyday build-up. A very effective pairing is often already in your kitchen.
The low-cost cleaning combo hiding in your kitchen
A well-known, budget-friendly approach used by many experienced home cooks centres on two common essentials: bicarbonate of soda and white vinegar. They’re cheap, easy to find, and typically much less aggressive than many commercial degreasers.
What each ingredient actually does
- Bicarbonate of soda (baking soda): a mild alkali that helps loosen grease and soften burnt-on food. Its fine texture also provides gentle abrasion.
- White vinegar: a mild acid that can help dissolve mineral build-up, soap residue and some discolouration, while loosening stuck deposits.
- Hot water: rehydrates dried food and helps the solution reach across the entire surface of the pan.
Each one can help on its own, but used in a straightforward order they can deal with stubborn residue while staying relatively gentle on most cookware.
Step-by-step: how to make pots shine again
For the inside of stainless steel or enamel pots
This approach is intended for metal and enamel interiors - not delicate non-stick coatings:
- Pre-soak with hot water. Fill the pot with very hot tap water until the burnt or greasy section is only just covered. Leave for 15–30 minutes.
- Add bicarbonate of soda. Tip in 2–3 tablespoons of bicarbonate of soda. For a large pot, increase to up to 4 tablespoons.
- Simmer gently. Put the pot on the hob and bring the mixture to a gentle simmer for 10–15 minutes. Avoid a vigorous boil.
- Cool and scrape. Switch off the heat, allow it to cool a little, then use a wooden or silicone spatula to ease off any loosened bits.
- Make a cleaning paste. Pour off most of the liquid so the surface stays damp. Dust more bicarbonate directly onto any stubborn areas and add a few drops of water to make a paste.
- Scrub lightly. Using a soft sponge or a non-scratch pad, rub in circular motions, then rinse thoroughly.
- Finish with vinegar. If staining or a cloudy film remains, add a small splash of white vinegar, swirl it around, then rinse again.
Let heat and chemistry do most of the work so your arms and your cookware don’t have to.
For burnt bottoms and outside surfaces
The underside often takes the most abuse. For the base and exterior, applying the mixture directly is usually more effective.
- Turn the pot upside down and dampen the bottom using warm water.
- Cover the stained areas with a generous layer of bicarbonate of soda.
- Add a teaspoon or two of vinegar so it fizzes gently, then smear it into a paste.
- Leave for 20–30 minutes. If marks are particularly stubborn, wrap the base in a damp cloth to stop the paste drying out.
- Scrub with a non-scratch pad, rinse, and reapply paste to any remaining dark patches.
Can this method be used on non-stick pans?
Non-stick surfaces require a gentler approach. Bicarbonate of soda and vinegar can still be used, but you should avoid simmering the mixture on the hob and keep abrasion to a minimum.
| Surface type | Safe to simmer? | Scrubber to use |
|---|---|---|
| Stainless steel | Yes, gentle simmer | Non-scratch pad or soft sponge |
| Enamel | Yes, low heat only | Soft sponge |
| Non-stick coating | No simmering | Very soft sponge or cloth |
| Cast iron (uncoated) | Yes, but avoid vinegar on the bare iron | Brush or non-metal scrubber |
Gentle method for non-stick interiors
- Fill the pan with hot tap water and a teaspoon of mild washing-up liquid.
- Leave it to soak for at least 30 minutes.
- Put a small amount of bicarbonate (about a teaspoon) onto a damp, soft sponge.
- Wipe the interior carefully, focusing on greasy rings and along the edges.
- Rinse well, and don’t scrub at any areas where the coating is already flaking or damaged.
A small splash of vinegar on the outside of a non-stick pan is usually fine, but many manufacturers recommend keeping stronger acids away from the coated interior.
When home remedies beat commercial cleaners
Shop-bought products for burnt-on residue can be fast-acting, but the compromises are familiar: intense fumes, possible skin irritation, and a higher price tag.
For most everyday build-up, bicarbonate and vinegar deliver enough cleaning power without the sting to your lungs or wallet.
There’s an environmental benefit, too. One bag of bicarbonate and one bottle of vinegar can replace several plastic bottles of specialist cleaners. Both substances break down readily and don’t come with the same hazard warnings found on many spray-on formulas.
How to stop pots reaching the “disaster” stage
The cheapest cleaning trick is the one you never have to use: preventing heavy burning and thick build-up in the first place.
Simple habits that keep cookware in shape
- Deglaze straight away: after frying, add a splash of water while the pan is still warm to lift residue before it sets.
- Avoid empty high heat: heating a dry pan for too long can bake tiny traces of oil into the surface.
- Soak, don’t bake on: if something sticks, add warm water as soon as the pan is safe to handle.
- Choose the right hob size: flames or elements creeping up the sides can scorch the outer walls.
- Use softer tools: wooden or silicone utensils help reduce scratches that grease can cling to.
When stains might signal a bigger problem
Most marks are purely cosmetic, but occasionally the issue goes beyond surface staining. A warped base can undermine cooking performance. Deep pitting inside aluminium cookware may point to corrosion. If a non-stick coating is peeling, it’s a sign the pan has reached the end of its useful life.
In situations like these, cleaning won’t restore how the pan cooks. The safer option may be to retire it - and look after the replacement more gently from the start.
Understanding what “burnt-on” actually means
The term sounds dramatic, but it often refers to a combination of carbonised food, fats that have oxidised, and (on some metals) mild colour changes caused by heat. These components don’t all respond the same way.
Carbon deposits tend to soften with soaking and bicarbonate of soda. Greasy films usually respond best to warm water and a mild detergent. Heat tints on stainless steel may reduce a little but often don’t disappear completely - and they rarely affect performance. Knowing what you’re dealing with helps set expectations: signs of heavy use can be cosmetic rather than a hygiene concern.
Realistic scenarios from a busy kitchen
Imagine a saucepan used for porridge every morning. Over time, a grey band can form around the level where the oats sit. A weekly gentle simmer in bicarbonate water, followed by a quick scrub, can prevent that ring from becoming a permanent feature - keeping the pan presentable without losing an hour at the weekend.
Or consider a roasting tray with dark, stubborn corners after a Sunday lunch. Instead of going at it with steel wool, you can cover the base with hot water and a couple of tablespoons of bicarbonate of soda, leave it overnight, then add a splash of vinegar the next day. The residue comes away with far less effort, and the tray is likely to last longer.
These quiet, inexpensive habits don’t feel like major cleaning projects. They simply slot into everyday cooking, keep your equipment looking better, and push back the day you feel tempted to shop for an entirely new set of pans.
Comments
No comments yet. Be the first to comment!
Leave a Comment