
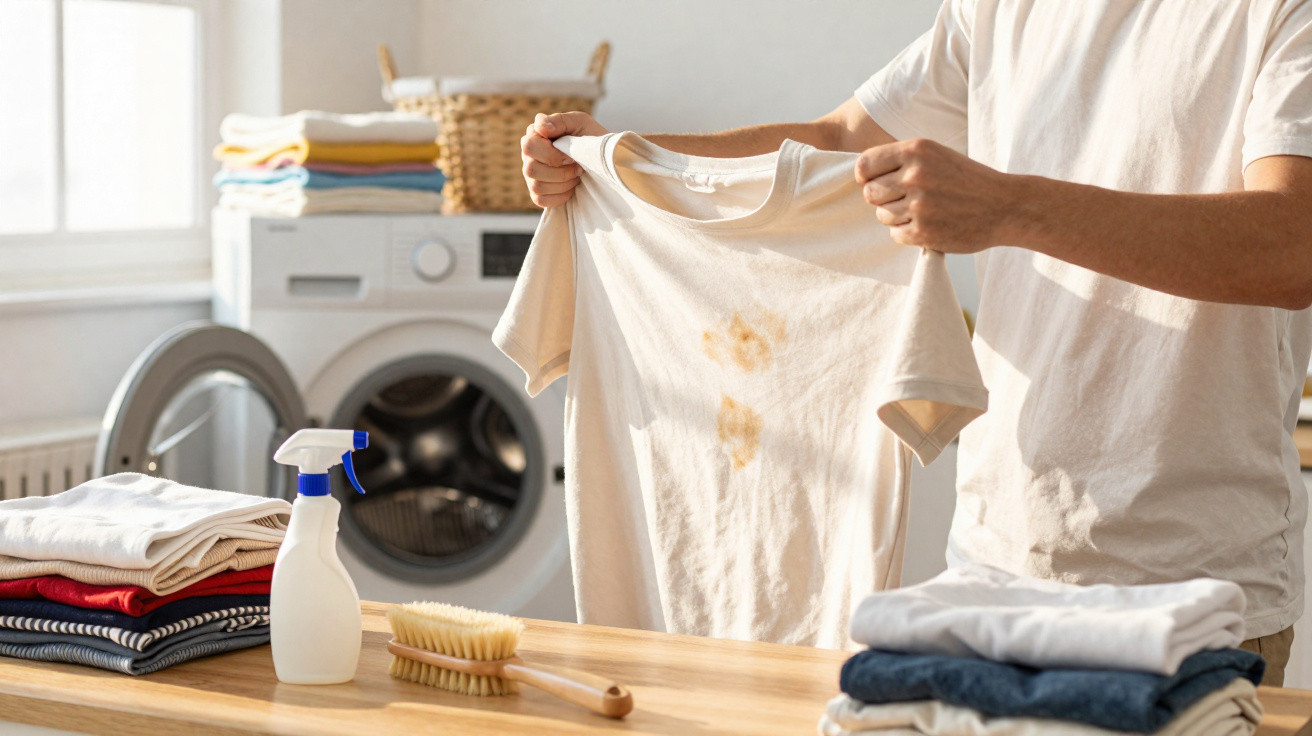
Many people automatically turn T-shirts, jeans and jumpers inside out before putting them in the wash. It sounds like a clever pro tip, protects prints and colour-and yet it often means stains linger and can even work their way deeper into the fibres. What matters isn’t the habit itself, but where the dirt and marks actually sit.
Why so many people turn their clothes inside out before washing
For most of us it’s a hand-me-down reflex: sort the laundry, fasten buttons, turn everything inside out. In plenty of households, that’s simply the standard routine-and it starts from a sensible idea.
Washing clothes inside out protects the visible outer surface from friction against the inside of the drum.
The benefits are straightforward:
- Prints, flocking and embroidery rub less against the metal drum.
- Dark fabrics wear more slowly and look less faded over time.
- The inner side is exposed, so detergent reaches sweat, deodorant and cream residues more effectively.
Especially with jeans, black hoodies and tops with large prints, this really can help: the garment’s “like-new look” lasts longer, and typical odour hotspots around the underarms or back can be cleaned more precisely.
That’s also where the trap lies. If you apply this technique blindly to every item, you often neglect the area that actually needs attention-the outside, where the visible stains are.
When washing inside out ruins the cleaning result
As soon as the outer side shows obvious marks, the advantage flips into a disadvantage. Turning the item inside out can reduce the cleaning impact.
Stains need direct exposure to water flow, the detergent solution and mechanical movement-otherwise they remain.
If you turn a dirty item inside out, a few things happen:
- The stain ends up “wrapped” within the fabric and gets less direct contact with the water.
- Friction happens more on areas that are already clean-rather than where it would actually help.
- Dirt can spread through the fibres instead of lifting out completely.
A particularly deceptive detail: after washing, everything smells fresh, and that scent can masquerade as cleanliness. Only during drying do edges reappear, or a faint shadow remains. In that moment the wash cycle may have pleased your nose, but it wasn’t thorough enough for the fibres.
This is especially troublesome with:
- Grease stains (oil, butter, salad dressing)
- Tomato or curry sauce
- Ground-in dirt and grass marks on knees or trouser legs
- Make-up and foundation lines on collars and cuffs
All of these cling strongly and react badly to heat. If they’re “hidden” on the inside, the stain can set more deeply or only fade slightly-until you catch it again in good light.
The golden rule: when to wash inside out, and when the right way round
Easy rule of thumb: Outer side dirty-wash the right way round. No visible stains-turn inside out for protection.
That way your clothes get both: protection and proper cleaning. In practice:
- Jeans without stains: Turn inside out to protect colour and fabric.
- Black hoodie with no visible marks: Inside out, so it stays a deeper black for longer.
- T-shirt with a large print but no stains: Inside out as well, to protect the print area.
- Trousers with grass stains on the knee: Pre-treat, then wash the right way round so the stain is exposed.
- Blouse with make-up on the collar: Treat the collar, then wash the right way round.
There are exceptions. Very delicate prints or thick, raised flock prints may still be safer inside out even if there’s a stain-however, the affected area must be worked on especially thoroughly beforehand, and the wash programme may need to run a little more intensively.
How to get stains properly clean: pre-treat instead of hoping
If you simply throw visibly stained items into the machine, you’re leaving results to chance. Effective stain removal follows three steps.
Step 1: Spot the stain-before it disappears into the laundry pile
A quick check when you take something off is enough: front, collar, sleeves, knee seams-those are where most stains show up. The earlier you notice them, the easier they are to shift.
Step 2: Dampen the stain and treat it appropriately
Different types of dirt need different support:
- Grease stains: Lightly dampen the fabric, apply a drop of washing-up liquid, and gently work it in.
- Protein-based stains (heavy sweat, blood): Rinse with cold water first, then use a stain remover-avoid heat at the start.
- Coloured sauces (tomato, curry): Apply an enzyme-based stain remover or stain soap, and leave briefly to work.
- Mud and soil: Let it dry completely first, then brush off the dust and pre-treat what’s left.
- Stubborn odours: Add a little bicarbonate of soda to the affected area, leave it to sit, then wash as normal.
How long you leave it to work often matters more than scrubbing hard. Gentle rubbing with your fingers or a soft cloth is enough. Too much pressure roughens fibres and makes clothes look worn sooner.
Step 3: Wash the right way round-so the stain is “in the firing line”
If the outside is the problem, it should face outwards in the machine. Then the water flow hits the stain directly, detergent works where the dirt actually is, and the drum movement helps lift it.
If you pre-treat first and then wash the right way round, you can often avoid having to run a full second wash.
Hold off on the tumble dryer until the stain has genuinely gone. Heat can “bake” leftover residue into the fabric, making it extremely difficult to remove afterwards.
The underestimated settings: temperature, load size, spin speed
Even the best pre-treatment loses its impact if the machine settings are off. A few factors make a big difference:
- Temperature: 30–40 °C is usually enough-higher can damage delicate colours, while too low won’t dissolve grease well.
- Load size: An overfilled drum limits the movement needed to loosen stains.
- Spin speed: Delicate items need a gentler spin; otherwise the outer surface suffers unnecessarily.
- Detergent amount: Too much leaves a greyish film on fabrics; too little won’t clean thoroughly.
- Zips and hook-and-loop fastenings: Close them first to prevent abrasion and micro-scratches on neighbouring textiles.
Good routines start at the sorting stage
If you sort laundry not only by colour and temperature but also by stain type, you save time and frustration. One quick glance per item is enough.
A single check before something goes into the basket often decides whether clothes look truly clean after one wash-or end up back in the machine.
Useful sorting habits:
- Put heavily soiled items to one side instead of mixing them into the normal wash.
- Look more critically at high-friction areas such as collars, underarms and waistbands.
- Place small items with hooks (bras) or hard embellishments into mesh laundry bags.
Building this short check into everyday life noticeably extends the lifespan of favourite pieces-and reduces the temptation to discard items simply because they “never quite look properly clean”.
Why smell and appearance often tell different stories
Many people judge washing results mainly with their nose: if it smells fresh, it must be clean. In reality, fragrances and fabric conditioner don’t remove stains-they only mask them.
Clean-looking fabric means:
- no visible edges or shadows after drying,
- no sticky or slightly rough patches,
- even colour with no dark or pale stain islands.
On light fabrics in particular, issues often only show up in daylight. If you regularly wash inside out even when the outer side is dirty, you’ll notice this more often-and it’s easy to assume the detergent is “weak”. In fact, the problem was the inside-out reflex.
The bottom line: not every old routine deserves to be set in stone. Turning clothes inside out still makes sense-but only when used deliberately. If you check for stains first and only then decide “inside out or right way round”, you’ll get far more from each load while also protecting colour, fibres and your patience.




Comments
No comments yet. Be the first to comment!
Leave a Comment