
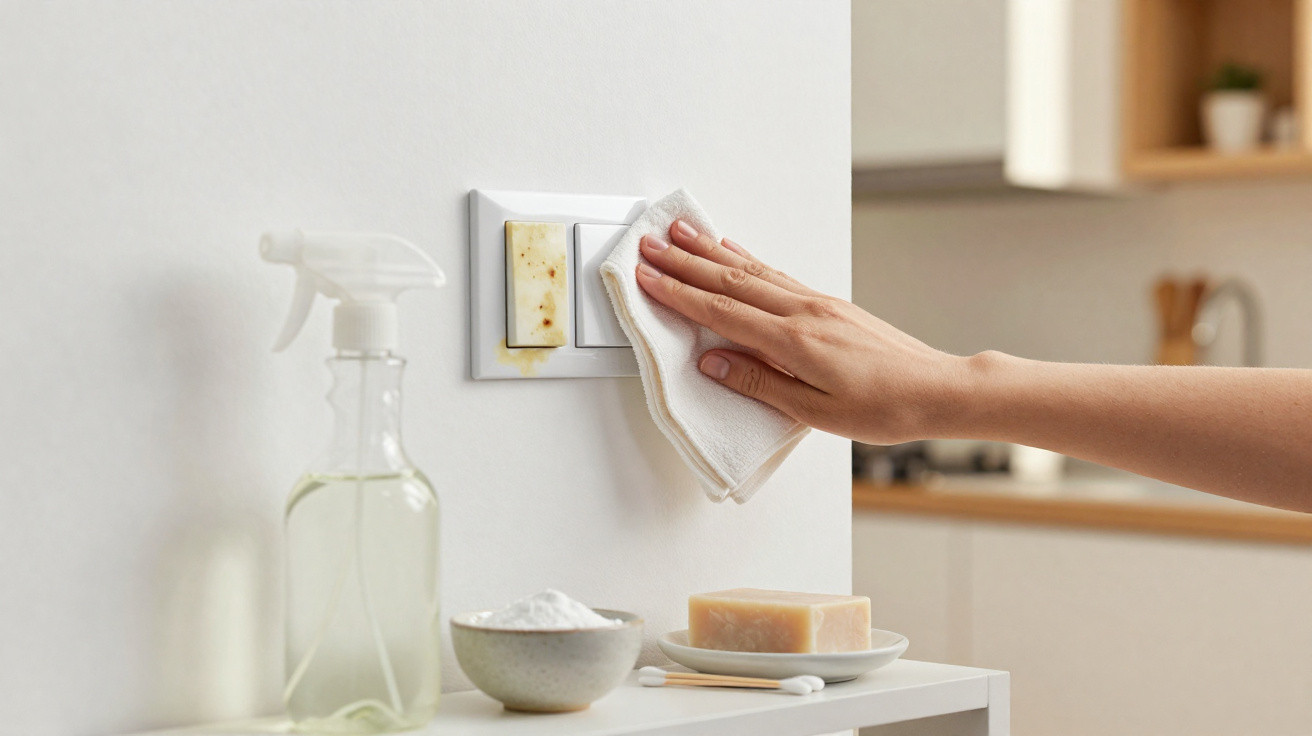
They can quickly turn into real bacteria traps and magnets for grime.
When you do a thorough clean at home, you’ll usually mop the floors, wipe down worktops and maybe tackle the windows. The small touchpoints are easily overlooked - and light switches are top of the list. That’s exactly where fingerprints, grease, dust and germs build up. With a few classic household staples and some simple steps, you can make switches look bright again without spending money on specialist cleaners.
Before you start: safety always comes first
Before you begin cleaning, there’s one short but essential job to do: make sure the electricity is safely off.
- At the consumer unit (fuse box), switch off the relevant circuit for that room.
- If you’re not completely sure, turn off the power for the whole home.
- Never clean a switch with a dripping-wet cloth.
Your cloth should be only slightly damp. If liquid runs into gaps and seams, it can damage the mechanism - and, in the worst case, become dangerous once the power is back on. For that reason, don’t spray cleaners directly onto the switch; apply them to the cloth instead.
"Basic rule: power off, cloth only lightly damp, never spray directly - that keeps cleaning light switches safe."
Tip 1: white household vinegar for grease and bacteria
Household vinegar has been a cleaning-cupboard staple for years. It works well on light switches too: it cuts through grease, reduces odours and has a mild disinfecting effect.
How to do it:
- Switch off the power.
- Pour a little warm water into a bowl and add a splash of vinegar.
- Dip in a cotton cloth and wring it out thoroughly until it’s only slightly damp.
- Gently wipe the switch surface and the surrounding plate.
- Buff dry with a clean, dry cloth.
If you add a few drops of lemon juice to the vinegar water, it smells fresher. Most switch plastics cope well with this mix, as long as you don’t scrub aggressively - use small, gentle motions.
Tip 2: bicarbonate of soda for yellowed plastic switches
In smoking households, dark hallways or poorly ventilated rooms, light switches can develop a yellow tinge over time. The staining makes everything look tired and grubby, even when the rest of the room is clean. This is where bicarbonate of soda (baking soda) comes in.
How to use it:
- Mix a thick paste from a few spoonfuls of bicarbonate of soda and a little water.
- Switch off the power, then apply the paste with a soft cloth or an old toothbrush.
- Rub lightly without pressing hard to avoid scratching the plastic.
- Leave it to work for a few minutes.
- Wipe off with a damp cloth and dry immediately.
If you need a bit more degreasing power, stir a small amount of mild soap into the paste. This can help lift stubborn nicotine marks or dull grey films of dirt.
Tip 3: traditional pure soap for everyday dirt
Solid soap bars - the sort often used for laundry - aren’t just for the bathroom. A mild pure soap or vegetable-oil soap also works well on switches and other plastic surfaces.
Method:
- Add a few soap shavings to a bowl of warm water.
- Stir until the water turns slightly cloudy and soapy.
- Dip in a cloth and wring it out very well.
- Carefully wipe the light switch and the surrounding plate.
- Use a second, only slightly damp cloth to remove any soap residue.
- Finish by drying everything thoroughly.
This approach is ideal for regular, routine cleaning when the switches are only lightly soiled.
Tip 4: cleaning alcohol for thorough hygiene
If you want surfaces to be as low-germ as possible, cleaning alcohol from a chemist or supermarket is a good option. It usually contains a high proportion of ethanol and removes microorganisms more reliably than water and soap alone.
How to apply it:
- Put a small amount of alcohol (about 70 percent) onto a slightly damp cloth.
- Rub the light switch surface carefully.
- Because it evaporates quickly, you usually won’t need to polish afterwards.
It’s handy: alcohol dries fast, doesn’t tend to leave streaks, and can give a subtle shine. As it’s flammable, avoid using it near open flames or hot hob rings, and consider wearing household gloves so your skin doesn’t dry out.
Tip 5: solvent for paint splashes
After decorating, tiny specks of paint often remain on light switches. If the paint is a tough type such as synthetic resin or epoxy, mild household cleaners may not be enough. In that case, a dedicated solvent can be the last resort.
Typical process:
- Mix a small amount of a suitable solvent with a little vinegar.
- Dab it on with a clean cloth rather than rubbing.
- Leave it for around 20–30 minutes.
- Wipe over with a damp cloth.
Only use this on robust, hard-wearing switch surfaces. If you’re unsure, test it first in an inconspicuous spot to check the plastic doesn’t go dull or discolour.
Tip 6: cotton buds for seams and edges
Most of the stubborn grime isn’t on the flat face of the switch, but in the fine seams around the rocker or button. Cotton buds are a small tool that can make a big difference here.
How to use them:
- Moisten a cotton bud with vinegar water, soapy water or diluted alcohol.
- Remove excess liquid so it can’t drip.
- Carefully run it along the edges, into corners and through small grooves.
"Keeping these tiny gaps clean makes a huge visual difference - the whole switch instantly looks more cared for."
Tip 7: clean removable switch covers in a water bath
Many modern light switches have clip-on frames or covers. If yours can be removed, cleaning becomes especially straightforward.
How to take advantage of it:
- Turn off the power and carefully release the cover (follow the manufacturer’s instructions).
- Place the covers in a bowl of hot water with a little detergent or soap.
- Leave them to soak for several hours.
- Wipe with a soft sponge until the dirt lifts away.
- Rinse under clean water and dry thoroughly.
- Only refit once everything is completely dry.
The electrical unit stays in the wall, untouched and dry, so you get a deeper clean while keeping safety high.
How often should you clean light switches?
There’s no single rule. It makes sense to build switches into your normal cleaning routine. In high-use areas such as the kitchen, hallway, children’s room or guest WC, a quick wipe every one to two weeks is often enough. In rooms you rarely use, a monthly check is usually sufficient.
| Room | Recommended cleaning |
|---|---|
| Kitchen | weekly to every two weeks |
| Bathroom / guest WC | every two weeks |
| Hallway | every two to four weeks |
| Living room and bedroom | once a month |
| Cellar / storage rooms | as needed |
The hygiene factor: why light switches are real germ hotspots
Light switches are classic high-touch points in any home. People press them several times a day, often with unwashed hands - and most of us barely notice. Especially during cold and flu season, cleaning them regularly can help reduce the overall germ load indoors.
If you live with small children, anyone with allergies, or someone with a weakened immune system, it’s worth paying extra attention to these areas. Cleaning alcohol or vinegar solutions can be a practical balance between effort and effectiveness.
What applies to modern switches and smart home systems
Many newer switches have glossy glass fronts, touch functions or built-in electronics. The same basics still apply: power off, no soaking-wet cloths, and avoid harsh abrasives or scratchy sponges.
For glass surfaces, a lightly damp microfibre cloth is usually a good choice. If you’re unsure, check the manufacturer’s documentation - there are often specific notes on which cleaners are permitted and which could damage the finish.
In most cases, simple options like vinegar water, bicarbonate-of-soda paste and soapy water - combined with careful drying - are all you need. If you do it regularly, you won’t have to scrub much, and the switches can still look as though they’ve only just been fitted.




Comments
No comments yet. Be the first to comment!
Leave a Comment